Salvaging a Dessert Disaster

Image

Above: The (successfully) remade cookie bars. See how I managed to salvage my disaster of a dessert. 

This is a story of kitchen hubris (mine) and dessert redemption (also mine). Maybe you’ve been there too. This is my cautionary tale:

I found two cans of sweetened condensed milk deep in my pantry recently. I had bought them a while ago “in case I needed them,” but obviously never had. I decided to use them up rather than throw them away. They were old. They didn’t even have expiration dates. But the cans weren’t bulging or anything, so I thought they were probably still good.

(Beep. Beep. Hazard ahead!)

The only recipe I know that uses SCM is Magic Cookie Bars. It’s easy: chocolate chips, nuts, coconut, raisins, pretzel pieces, butterscotch chips, whatever, on a graham-cracker-and-butter base in a 9-by-11 pan, bound by the sweetened condensed milk poured over it and then baked and cut into bars.

As a bachelor, my husband used to make Magic Cookie Bars whenever he needed to contribute to an office potluck. I thought I’d surprise him by putting one of those old cans to good use and making a batch.

So I set up the graham-cracker base, scattered a cup each of chocolate chips, chopped peanuts, coconut and raisins, then opened one of the cans of SCM.

(Alarm bells. Warning!)

Oh my.

It was the color of crankcase oil and the consistency of petroleum jelly. It didn’t smell sweetened; it had a faint cheese odor instead.

But I’d never baked with SCM before, so maybe it always looked like this, I told myself.

(Klaxon horns. Danger!)

I spooned it onto the cookie bars and put the pan into the oven. Maybe the heat of the oven would transform it into something more appetizing.

A half-hour later, out of the oven it came. Or should I say, “Out of the oven — ‘IT’ came.”

Image

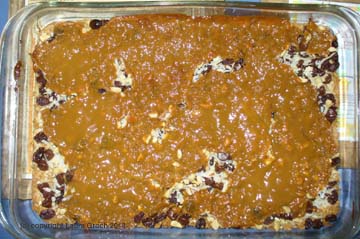
The pan looked exactly the same. This was not good. (see photo above)

My husband came into the kitchen to see his cookie bars. They were a surprise, all right. Gallantly, he said, “I’m sure they will be OK.”

After dinner, we dug in. They weren’t.

Glumly, we chewed through our portions. Everything else in the bars tasted OK. The sweetened condensed milk was obviously past its prime, but not really BAD. Just not really GOOD.

I put the pan in the fridge, chagrined and humbled by my bad decision.

Throwing the bars out would be a shame, though I was leaning that way. (I had already tossed the other can of SCM.)

If only I could save them. But how?

In bed that night, thinking about my defeat, it dawned on me that most of the ingredients were solid: nuts, coconut, raisins. Even the chocolate chips came out of the oven unchanged.

More to the point, they were all pretty waterproof.

What if I could wash them? Dissolve that Bad Sweetened Condensed Milk off them? I’d lose the graham-cracker base, but that was OK. The whole pan would be a loss otherwise.

The next morning, I filled a large bowl with water and sat it in the sink. I broke off parts of the Bad Cookie Bars and dunked them into the bowl. Then I squooshed them and mooshed them around in the water, breaking them up with my fingers, until everything was dissolved off.

I drained and rinsed what was left, and spread it in a pan to dry. I had raisins. Coconut. Peanuts. And chocolate chips — intact, though they had softened a bit. More important, they hadn’t dissolved.

(Trumpet fanfare. Rescue at hand!)

I let the ingredients dry for a few hours before heading to the store for fresh SCM and more graham crackers. (And FYI, fresh sweetened condensed milk looks like vanilla pudding.)

Then I remade those bars using the laundered ingredients, plus another cup of coconut. They baked up pretty the second time around and tasted just fine. Whew.

(Angelic choir. Victory!)

(c) copyright Laura Groch 2013

Advertisement

Pick a peck of peppers, and roast ’em

Image

When peppers go on sale, buy a bunch and roast them yourself. (Photos by Laura Groch)

Roasted red peppers are a colorful, versatile addition to your kitchen palette. You can buy them for upwards of $6 a jar — or I can show you how to roast your own for a fraction of the cost. And with peppers at such bargain prices this week (they’re going at 3 and 4 for $1), it’s time for a lesson in this easy way to add a gourmet touch to summer salads, sandwiches, pizzas and more.

You don’t need to build a fire to roast a pepper. I often roast mine in my little toaster oven. You can also use your oven or even a barbecue grill (just make sure the fire isn’t TOO hot, as they can burn beyond salvaging in just a few moments).

Roasting (really, broiling) peppers softens them and adds a bit of sweetness. I like to roast red bell peppers, but any color pepper will work. Use what you like (that includes jalapenos, Anaheims, etc.) and whatever’s at the best market price.

Here’s how:

Wash peppers; slice them in half lengthwise. Clean out the seeds and remove the stems. Rub or spray with a little bit of olive oil if you wish. Lay them flat on a foil-covered roasting pan, skin side up — or if you’re using a grill, do them skin side down. The idea is to get the skin side close to the heat source.

Image

Broil or grill the peppers until the skins are blackened but not burned. (See photo: They should look a little bit scary.) Try to position the peppers so they blacken evenly; it’s not necessary to blacken the whole surface.

When the peppers are ready, use tongs to remove them from the oven or grill and transfer them into a plastic bag. (I usually save a couple of empty cereal bags — the kind that line cardboard boxes of cereal — for this purpose. They’re very sturdy and leak-proof.) Add any juices that may have collected in the pan. Then close the bag tightly with a clip or twist-tie. Leave some air space — you don’t have to roll the bag shut all the way down to where the peppers are.

Let the peppers rest in the bag for about 20 minutes. They’ll continue to steam for a bit, and then they’ll cool off enough for you to handle them.

Now you’re ready to peel them. Remove the pepper halves one by one from the bag. The blackened skin will have blistered and raised from the flesh a bit. Put the pepper on a cutting board and grab a piece of skin. It should peel away easily from most of the pepper’s surface. You may not be able to remove all the skin — that’s OK.

Slice the peeled pepper into strips (my preference) or leave them in bigger pieces. Put the peeled peppers into a bowl, and pour over any juices that may have collected in the bag or on your cutting board. You can now add some olive oil to them, a dash of your favorite vinegar if you like, or maybe some shaved garlic. Stir and refrigerate.

Image

What can you do with roasted peppers? Try them as part of an antipasto plate with olives, mozzarella, salami and artichokes. Use them to liven up salads. They’re also wonderful in an omelet or frittata or quiche, and on homemade pizza (or add them to storebought pizza). Stir them into a pasta dish with chopped tomatoes and/or sauteed zucchini.

They’re also great in sandwiches. One of my favorites is a simple vegetarian sandwich: Split open a crusty roll or other sturdy bread, spread with a little hot chili sauce, and then top with hummus, sliced red onion, tomato, cucumber and roasted peppers. Yum! It’s light and easy on a hot day when you don’t feel like cooking.

I’m sure you’ll come up with more ideas. Roasted peppers will keep for about a week in the fridge. I don’t recommend freezing them, as the texture will break down too much. So enjoy them — and the money you just saved by making them yourself!

(c) copyright Laura Groch 2013