Bless these throats

St. Blaise is not the patron saint of cooks — that would be St. Lawrence — but he is the patron saint of throats, which is the main way we experience our food.  (That’s how I’m making this a food-related post, guys.) Today is his feast day, and on this day, Catholic Churches still conduct the annual blessing of throats associated with his memory. (Legend has it he cured a child who was choking on a fishbone.) I went to parochial school for six years, and after morning Mass on Feb. 3, we would line up to receive our individual neck check. Some priests just held two candles together in one hand in the shape of an X; in other parishes, the candles were specially formed to go partly around the neck. The priest held the juncture of the candles briefly to the person’s throat while asking St. Blaise to save us from all related ailments. A comforting ritual, as many rituals are meant to be. I just wanted to give St. Blaise a shout-out and a thank you on his special day!

(c) copyright Laura Groch 2014

Bowl ‘Em Over With Biscuits

Image

Cheddar Buttermilk Biscuits from Amaya La Jolla make a great go-with for your Super Bowl fare, or another dish, or just by themselves with butter. (Photo by Kelley Carlson)

Super Bowl Sunday is coming up fast, and bowls of chili, gumbo, and other warming fare will be on the menu of gatherings across the country. Here’s an idea for a go-with dish — a yummy biscuit I had the good fortune to sample at Amaya La Jolla recently. These Cheddar Buttermilk Biscuits were part of Chef Camron Woods’ delicious roast suckling pig slider appetizers — but they’d also be great supporting players for the abovementioned chili, gumbo, soups, stews, etc.

Biscuits are enjoying a bit of a renaissance (did we all get tired of polenta?), and they’re fairly easy to put together. (Note that the recipe calls for at least 4 hours’ chill time, or overnight, so plan accordingly.)

Here’s the recipe from Amaya La Jolla, courtesy of Pastry Chef Michael Luna. Truth in advertising: I don’t have a kitchen scale, so I made these conversions (in parentheses) with the help of online sources.

CHEDDAR BUTTERMILK BISCUITS

1 pound, 4 ounces White Lilly flour (about 4 1/2 cups)

1 1/2 teaspoons cream of tartar

1/4 cup sugar

2 1/4 teaspoons salt

2 1/4 teaspoons baking soda

1 tablespoon baking powder

4 ounces shortening

6 ounces sharp cheddar cheese, grated

1/4 ounce thyme (1 tablespoon)

15 ounces buttermilk

2 ounces butter, softened

In a large bowl, mix the first six dry ingredients together.

Cut the shortening into this dry mixture by hand, until about pea-sized. Put in freezer overnight or up to 4 hours.

Place the chilled flour mixture into the bowl of an electric mixer. Add the cheddar and thyme and pulse to incorporate. Add the buttermilk in a slow steady stream and mix until fully combined.

Let the dough rest for about 30 minutes, covered in the mixing bowl.

Generously flour the surface of the workstation and roll the dough out to about the size of a 9” x 13” pan.  Spread the butter over 2/3 of the left side of the dough and book-fold once, folding from the left side to the right, leaving enough room to tri-fold from the right side on top of the part that you just folded.

Turn the dough 90 degrees on the table. Proceed to roll out the dough to about 1/4-inch thickness and cut to desired size diameter of biscuits.

Bake at 325 degrees for 20 minutes and brush with butter when they come out of the oven golden brown.

(c) Laura Groch 2014

Dozens of reasons to enjoy a cookie exchange

Image

Above: The assorted cookies I brought home from our recent cookie swap. For a cookie swap, you bake only one batch but end up with a beautiful assortment of delicious cookies. (Photos by Laura Groch) 

If you’ve never taken part in a cookie exchange before, let me recommend this enjoyable way to share the holiday spirit. And it’s not too late in the season to organize one.

I don’t remember where I first heard about cookie exchanges or cookie swaps, but I do know that the idea immediately struck me as a winner: Bake one batch of cookies, get together with a group of friends, and divvy up the cookies. Go in with snickerdoodles, come out with chocolate chip, peanut blossoms, rugelach, Mexican wedding cakes and more, depending on the group.

I enlisted my officemates to try it out, and it worked so well that we started a December tradition. Not only was it fun, it was efficient and saved buckets of time when everyone was being pulled in several directions at the holidays. This year found me swapping with another group of friends, who were also pleased with the results.

As I said, it’s not too late for you to enjoy the fun, creativity and rewards of doing a cookie exchange. (How about organizing one for a Saturday-or-Sunday-before-New-Year’s get-together!) All you need are 1) a batch of homemade cookies; 2) a few friends, relatives or colleagues (make sure one of you is good at math!); 3) about 90 minutes to make the exchange in whatever place you designate; and 4) an extra container to put your shared cookies into while others are taking from your batch.

The basic idea is to divide the cookies by the number of bakers, then each one takes that number of cookies from everyone else. So if you have 6 people, you bake, say, 4 dozen cookies (48). Forty-eight is evenly divisible by 6 (6 x 8 = 48). Everyone keeps 8 of his or her own cookies, takes 8 from everyone else’s batch, and you go home with 48 cookies, the same number you brought in, except you now have six different kinds.

At least, that was the way this recent cookie exchange was supposed to work. But I managed to goof up the neat calculations by not counting myself in the group. We really had 48 cookies each to be divided among 7 bakers. (Oy.) So — we instead took 7 each, then divvied up the remainder. Which is what you might have to do, too. (Or you can reverse-engineer it: Choose a number, say 6 cookies apiece, multiply it by the number of cookie swappers, then everyone bakes that amount.)

We used to have as many as a dozen people, and we’d each bake as many as 6 dozen cookies (also a nicely divisible number). Something always happens, though. One person always bakes more, another bakes fewer — recipes are variable, after all, and so is the human hand. But someone else always manages to figure it all out to everyone’s satisfaction.

The cookies don’t have to be fancy — not at all. Of course, if your specialty is an elaborately decorated cookie, go for it. Just don’t be disappointed that others can’t match your baking prowess. Remember, they’re all still tasty cookies!

The one big rule is that the cookies must be homemade. It’s not fair to those who actually made dough and shaped and decorated it (or even just dropped spoonfuls onto a cookie sheet). They put effort into their cookies, no matter how simple (or blobby). It’s just not right to hand over a machine-made cookie in exchange for an individually made little work of art.

And they are all works of art, I can assure you, from the humble oatmeal cookie to the sophisticated palmier. The sight of them arrayed on a plate will gladden your heart as much as anything by Picasso or Renoir or Wyeth.

Or Norman Rockwell, for that matter. Bringing together different people and traditions and recipes to share them with each other is about as American as it gets, in my view — and it also reflects the spirit of the season.

Really, there’s no good reason why the Christmas/Chanukah/Kwanzaa time of year should hold a monopoly on pretty cookies. In fact, we’re already planning a Valentine’s Day cookie exchange.

Image

Above: Cranberry Refrigerator Rounds (OK, they’re a little oblong) are what I made for a recent cookie exchange. (Photo by Laura Groch)

I made this refrigerator cookie for our recent cookie swap, but used cranberries this time instead of apricots. It’s from “Gifts From Your Kitchen,” by Better Homes and Gardens (Meredith, 1976).

APRICOT REFRIGERATOR ROUNDS

1 cup butter or margarine

1 1/2 cups packed brown sugar

1 egg

1/2 teaspoon almond extract

2 1/2 cups all-purpose flour

1 teaspoon baking powder

1/2 teaspoon salt

1 cup finely chopped dried apricots (or cranberries)

1/2 cup finely chopped nuts

Cream together butter and brown sugar till light. Blend in egg and almond extract. Stir together flour, baking powder and salt; stir into creamed mixture. Stir in apricots and nuts. Shape into two rolls 1 1/2 inches in diameter. Wrap in waxed paper. Chill well. Cut in 1/4-inch slices; place on ungreased baking sheet. Bake at 350 degrees for about 10 minutes. Makes 6 1/2 dozen.

Notes: I used butter, not margarine, and about 1/4 cup of nuts (I used walnuts) instead of 1/2 cup. A knife will do to chop dried apricots, but I used kitchen shears to chop the cranberries.

(c) copyright Laura Groch 2013

Thankful for a special Italian recipe

Image

My maternal grandmother, “Nini,” and her rumpled granddaughter, who still makes her special Thanksgiving stuffing. (c) copyright Laura Groch 2013

Wishing you all an early Happy Thanksgiving! :<)

Everyone’s Thanksgiving is full of rituals beyond the turkey. As a kid, the family must-haves included a local TV station’s annual showing of “March of the Wooden Soldiers,” the Laurel and Hardy classic, followed by watching the Macy’s Thanksgiving Day parade.

Our table offered Italian antipasto — black olives, salami, artichoke hearts — and we drank asti spumante, not red wine or beer.

Gloppy green bean casserole was unheard-of; instead, we had fresh broccoli and a green salad, and my grandmother’s special stuffing ladled out of the bird.

After dinner, the turkey carcass rested majestically on the stove for several hours as we all picked at it, no doubt contributing to the eventual upset stomachs that were also a holiday ritual (we didn’t know as much then about food poisoning as we all do today).

On Thanksgiving Days now, I start the preparations by turning on the parade as background accompaniment. (Sadly, no one broadcasts “March of the Wooden Soldiers” any more.)

We still do the antipasto plate, the asti and the broccoli. But we no longer stuff the turkey; that concession to speed and food safety came years ago, with stuffing now prepared on the side.

And the turkey, which these days is grilled by my husband over mesquite wood on the faithful Weber, is bustled into the fridge right after serving instead of breeding bacteria as in days gone by. (Some rituals you just don’t need to keep.)

But my grandmother’s special stuffing is still one of my favorite things about Thanksgiving.

A skilled midwife from Sicily who immigrated to Brooklyn, she wanted her grandkids to call her Nini (to rhyme with “mini”). She became familiar with American foods through her clients and her children. It took a little trial and error — when her daughter, my mother, wanted peanut butter, for example, Nini bought it, but was mystified when the sandwiches didn’t come out quite right. A more Americanized uncle had to explain that jelly was also needed to make a classic PB&J.

I like to think that must be how this recipe came about: When Nini learned that stuffing was expected in the American turkey, she created it her way, using rice and Italian sausage.

I think it’s delicious. Nini is long gone, but she returns to our table every year when I make this simple recipe for the rest of the family. Here’s how my mom dictated it to me.

NINI’S SAUSAGE AND RICE STUFFING

Cook 1 cup white rice in 2 cups chicken bouillon or giblet water (water you cooked the turkey giblets in).

Brown 3/4 pound Italian sausage (skinned and broken up) with 1 medium onion, chopped, 1 clove garlic, chopped, and 1 stalk celery, chopped.

Drain off fat.

In casserole dish, combine sausage mixture and rice; mix well. Top with grated Parmesan cheese. Bake in 350-degree oven for about 15 minutes. Serves 4.

Notes: You can make this with brown rice, or turkey sausage; you can add the chopped, cooked giblets to it or not. Adjust the amount of celery or onion to your taste. I like it browned a little on top to make some crispy bits.

(c) copyright Laura Groch 2013

Lima Love

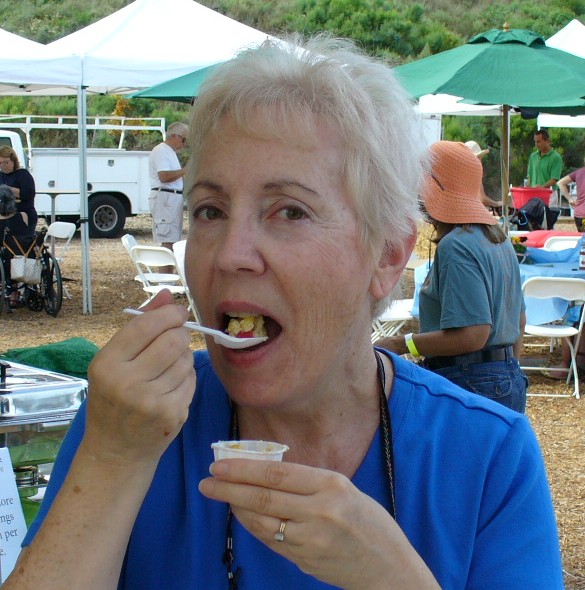
Laugh if you like, but I’m growing fonder of lima beans year by year.

This past Saturday marked the fifth year of Encinitas’ Lima Bean Faire, a fundraiser for the San Dieguito Heritage Museum (www.sdheritage.org) and my fourth year (I think) as a judge of the faire’s cooking contest. (Also judging were Coast News columnist David Boylan (“Lick the Plate”) and Chef Marian of ChefMarian.com.)

I was not a fan of lima beans as a child. They were the hated ingredient in the blocks of frozen succotash that were our family’s default dinner vegetable. They were mealy and dry, and far inferior to the corn niblets and green beans they accompanied.

But now, after several years of experiencing limas transformed by amateur and professional chefs, I’ve come to appreciate them. They certainly are no longer the shriveled nubbins I remembered from childhood. Nope. I now know them as moist, inviting, satisfying and savory, not to mention nutritious, full of fiber and economical, as most beans are.

This year’s contest allowed other kinds of beans besides limas, and entries included soups, dips, salads, stews, casseroles and pasta dishes, as well as several (yes!) desserts. According to Jean Bruns, a museum board member, this year’s turnout was 21 cooks entering 26 dishes.

The winners:

People’s choice:  Sean O’Leary – L Im A Piggy Soup;

Professional division:

Salad/Side – Brett Nicholson, Brett’s BBQ: Black Bean Salad

Entree/Side — Steve Molina, Delicias Restaurant, Five Bean Fritters With Spiced Yogurt Tzatziki;

Dessert — Mary Dralle/Cooking With “Klibs,” Xocolatl Bars.

Amateur division:

Salad/Side — Evelyn Weidner, Ginger Citrus and Sweet Chipotle Dips;

Entree/soup — Sean O’Leary, L Im A Piggy Soup;

Dessert — Kristin Gaspar, Mini Lima Bean Pies

Winning recipes, as they have been every year, will be compiled in the group’s fundraising cookbook, soon to be available at the museum, 450 Quail Gardens Drive, Encinitas (760-632-9711).

Sean O’Leary’s prize-winning soup was one of my favorites. He’s a former chef turned freelance photographer (www.simplysophotography.com). This recipe makes a LOT of soup, but you can cut it down for a smaller batch. The  pork bone is for flavor, not for meat, Sean says. He adds that you can roast it beforehand for more flavor in the soup.

L IM A PIGGY SOUP 

5 pounds dried lima beans

6 stalks celery

3 carrots, peeled

2 1/2 pounds onions, peeled

1 head garlic, peeled

1 Fresno chile, seeded

1 pound ham, chopped

1 pound pork shoulder bone or other pork bone (not meaty)

1 bunch parsley stems

1 bunch green onions

1 1/2 tablespoons paprika

1 tablespoon cumin

1 tablespoon dried oregano

1 1/2 gallons chicken broth

Salt and cracked black pepper

Lime Creme:

12 ounces sour cream

4 ounces mayo

1 lime

Kale Chips:

1 bunch kale

Leek Threads:

1/2 pound leeks, cut lengthwise and cleaned

Soak dried lima beans overnight in a 20-quart stock pot. Make sure water level is at least 4 times the volume of the beans.  The next morning, strain the beans in a colander and set aside.

After cleaning and preparing vegetables, rough-chop them. You don’t want to cut them too small.

Place the dry 20-quart stock pot back on the stove and add some vegetable oil over medium heat.  Let the pot get warm.  Add celery, carrots, onions, garlic and chile, and sweat them until they are translucent by occasionally stirring them. This should take 8 to 10 minutes.

At this point add reserved lima beans, ham, pork bone, parsley stems, green onions, paprika, cumin, oregano and chicken broth.  Cover and bring to a boil, then turn down heat to low and simmer for 3 hours or until beans are soft.

Remove pork bone and discard.

Cool soup until it is about room temperature.  It is best to cool soup as quickly as possible by placing pot in your kitchen sink. Surround the pot with ice and fill sink with cold water a quarter full.  Stir soup to cool it faster.  Once soup is cool enough, blend in a blender starting at low speed and working up to high speed until soup is smooth. Do small batches at a time.  Reheat soup and season to taste with salt and pepper.

Lime Creme: While soup is cooling, mix sour cream, mayo and lime juice as desired in a small bowl.  Add a little water and salt until desired thickness and flavor.

Kale Chips: Cut the leafy part off the kale stems.  Now cut kale into desired size.  In a saute pan, add vegetable oil to fill saute pan 1/4 full.  Heat oil to medium-high. Place a little bit of kale in saute pan at a time. Be careful — the kale will splatter oil due to water content in the leaf. Pan fry kale until oil is no longer bubbling around the cut pieces.  Remove from pan with a slotted spoon and shake over pan to remove excess oil. Place on paper towel to drain and season with a little salt while still hot.  Set aside.

Leek Threads:  This is the exact same method as to make the kale chips. Slice the leeks crosswise into thin shreds and then pan fry.

Once you have all the components ready, ladle soup into bowls and garnish with Lime Creme, Kale Chips and Leek Threads.  Enjoy!

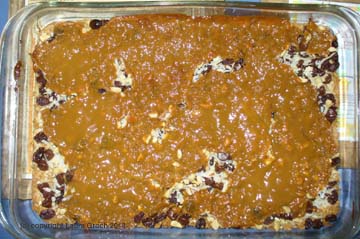
Here’s the recipe for Xocolatl Bars from Mary Dralle’s (“Cookin’ With Klibs”). The recipe uses lima bean flour, which she said she gets at the Santa Ysabel General Store. “Frazier Farms in Vista carries bean flours as well as Jimbo’s, Sprouts and Henry’s,” she noted. “A substitute bean flour could be used in place of the lima bean flour.”

XOCOLATL BARS

1/2 cup lima bean puree

1/2 cup butter, unsalted

1 cup raw sugar

1 cup brown sugar, slightly packed

2 eggs

1 teaspoon vanilla

2 tablespoons creme de cacao liqueur

1 1/2 cups dark chocolate chunks

2 1/4 cups unbleached flour, sifted

3/4 cup lima bean flour, sifted

1/4 cup unsweetened cocoa powder

2 teaspoons chipotle chile powder

1 teaspoon baking powder

1 teaspoon baking soda

1 teaspoon salt

In a large mixing bowl, cream the first four ingredients until fluffy.

Beat eggs in one at a time, then fold in vanilla, creme de cacao, and dark chocolate chunks.

On a large piece of wax paper, measure out all of the dry ingredients. (This method will ensure that all of the items are added.) Fold wax paper in half, pour into sifter and sift into bean mixture. Fold until all is incorporated.

Press dough into a parchment paper-lined 11-by-17-inch jelly roll pan. Bake at 350 degrees for 30 minutes or until inserted knife comes out clean.

(c) copyright Laura Groch 2013

Salvaging a Dessert Disaster

Image

Above: The (successfully) remade cookie bars. See how I managed to salvage my disaster of a dessert. 

This is a story of kitchen hubris (mine) and dessert redemption (also mine). Maybe you’ve been there too. This is my cautionary tale:

I found two cans of sweetened condensed milk deep in my pantry recently. I had bought them a while ago “in case I needed them,” but obviously never had. I decided to use them up rather than throw them away. They were old. They didn’t even have expiration dates. But the cans weren’t bulging or anything, so I thought they were probably still good.

(Beep. Beep. Hazard ahead!)

The only recipe I know that uses SCM is Magic Cookie Bars. It’s easy: chocolate chips, nuts, coconut, raisins, pretzel pieces, butterscotch chips, whatever, on a graham-cracker-and-butter base in a 9-by-11 pan, bound by the sweetened condensed milk poured over it and then baked and cut into bars.

As a bachelor, my husband used to make Magic Cookie Bars whenever he needed to contribute to an office potluck. I thought I’d surprise him by putting one of those old cans to good use and making a batch.

So I set up the graham-cracker base, scattered a cup each of chocolate chips, chopped peanuts, coconut and raisins, then opened one of the cans of SCM.

(Alarm bells. Warning!)

Oh my.

It was the color of crankcase oil and the consistency of petroleum jelly. It didn’t smell sweetened; it had a faint cheese odor instead.

But I’d never baked with SCM before, so maybe it always looked like this, I told myself.

(Klaxon horns. Danger!)

I spooned it onto the cookie bars and put the pan into the oven. Maybe the heat of the oven would transform it into something more appetizing.

A half-hour later, out of the oven it came. Or should I say, “Out of the oven — ‘IT’ came.”

Image

The pan looked exactly the same. This was not good. (see photo above)

My husband came into the kitchen to see his cookie bars. They were a surprise, all right. Gallantly, he said, “I’m sure they will be OK.”

After dinner, we dug in. They weren’t.

Glumly, we chewed through our portions. Everything else in the bars tasted OK. The sweetened condensed milk was obviously past its prime, but not really BAD. Just not really GOOD.

I put the pan in the fridge, chagrined and humbled by my bad decision.

Throwing the bars out would be a shame, though I was leaning that way. (I had already tossed the other can of SCM.)

If only I could save them. But how?

In bed that night, thinking about my defeat, it dawned on me that most of the ingredients were solid: nuts, coconut, raisins. Even the chocolate chips came out of the oven unchanged.

More to the point, they were all pretty waterproof.

What if I could wash them? Dissolve that Bad Sweetened Condensed Milk off them? I’d lose the graham-cracker base, but that was OK. The whole pan would be a loss otherwise.

The next morning, I filled a large bowl with water and sat it in the sink. I broke off parts of the Bad Cookie Bars and dunked them into the bowl. Then I squooshed them and mooshed them around in the water, breaking them up with my fingers, until everything was dissolved off.

I drained and rinsed what was left, and spread it in a pan to dry. I had raisins. Coconut. Peanuts. And chocolate chips — intact, though they had softened a bit. More important, they hadn’t dissolved.

(Trumpet fanfare. Rescue at hand!)

I let the ingredients dry for a few hours before heading to the store for fresh SCM and more graham crackers. (And FYI, fresh sweetened condensed milk looks like vanilla pudding.)

Then I remade those bars using the laundered ingredients, plus another cup of coconut. They baked up pretty the second time around and tasted just fine. Whew.

(Angelic choir. Victory!)

(c) copyright Laura Groch 2013